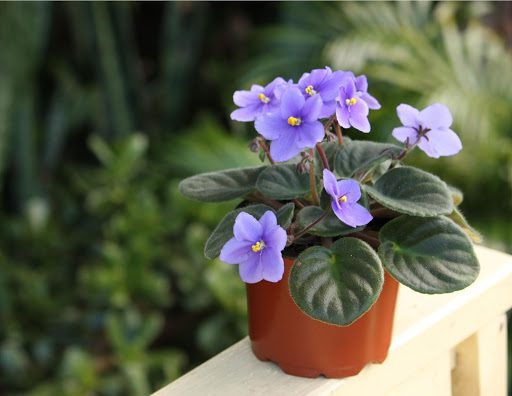
Your African violet can produce dazzling blooms year-round with the right care. However, there’s one important practice that can make novice growers shake in their garden boots: repotting.
African violets have several notorious quirks: they don’t like getting wet; they’re sun-sensitive; and they struggle in standard soil—just to name a few. It’s reasonable to worry that repotting your plant is just another chance to mess things up.
But never fear—you’re wrong!
Like most aspects of African violet care, repotting is quite easy, and a lot less scary if you master a few simple steps. This beginner-friendly guide to African violet repotting is here to light the way!
How Often Should I Repot My African Violet?
The short answer: At least twice a year.
Even if you regularly fertilize your plant, it needs fresh soil from time to time. Repotting your plant replenishes depleted nutrients, balances soil chemistry, and accommodates new growth.
The long answer: When your plant needs it.
Your plant won’t always grow by your set schedule. It may develop a long leafless neck and need immediate attention. Or, perhaps you notice roots escaping out the drainage hole and sneaking over the soil surface (a red flag your plant is becoming root-bound). In both of these cases, it’s time for African violet repotting—even if you’re a little ahead of your calendar.
African Violet Repotting Step By Step
1. Preparation
First, prepare your tools and space. You’ll either return your plant to the same pot or transfer to a different-sized container. If your plant is root-bound, it’ll be happier in a slightly bigger pot. If it’s struggling to bloom, or its soil is retaining too much water, you may want to size down.
Houseplant Pro Tip: African violets are happiest in containers that are about ⅓ the diameter of the spread of their leaves.
Scrub-a-Dub: African violet repotting is a prime time for pests and diseases to find a new host. Disinfect any tools or pots you’re using, wash your hands, and give your table space a good wipe-down.
2. Remove Your African Violet
Next up, extraction. If your plant lives in a porous container, like a clay pot, you might want to give it a drink first. However, watering causes plants to swell, which makes them more prone to repotting injuries. With less porous containers, like plastic or ceramic, it’s wise to hold off until after you’ve finished the job.
One Good Tug: Grasp your African violet at the base, getting a hold of as much of the crown as you can. Tilt the pot sideways or upside down and tap the bottom; if it doesn’t pop right out, stick your finger through the drainage hole and give it a push.
3. Tend to the Roots
Next, brush the root ball clean. Gently remove the soil with your hands, a small rake, or a soft toothbrush. Examine the root ball; are there any black, brown, or mushy sections? If so, cut them away and consider applying a root rot treatment to prevent further spread of decay.
Buy African Violet Root Rot Treatment online.
4. Pretty Up Your Plant
After you’ve given the roots a little TLC, it’s time for a haircut. Free up energy for your plant to reroot by pruning away damaged or dying leaves. African violets tend to grow haphazardly, so now’s a great time to trim uneven leaves and satellite suckers.
The More, the Merrier: This doesn’t have to be the end of the road for healthy leaves and suckers. Give African violet propagation a try—it’s easy!
Can you repot an African violet when it’s blooming?
Moving is stressful enough! We recommend waiting for a lull in blooming before you repot. That said, if your plant is tightly root-bound or at risk of toppling over, it’s okay to repot while flowering. Some experts suggest removing existing blossoms to give your plant more energy to recover (don’t worry, it’ll bounce back!).
5. Repot Your African Violet
Place a thin layer of soil inside the pot and set the root ball on top. Gently cover up to the base of the leaves and pat down just enough to stabilize. (Keep it loose!) Place in a saucer of water and allow your plant to soak up as much as it likes.
What is the best soil for an African violet?
African violets love fluffy, slightly acidic soil; they’ll struggle in a standard mix. Check out our guide to African violet potting mix to learn all about the perfect blend.
How do I repot an African violet with a neck?
African violets grow new leaves from the crown outwards. Older leaves near the bottom eventually die and fall off, sometimes leaving a bare, trunk-like neck. This can make your plant vulnerable to toppling over, but it’s an easy fix. Repot your plant as normal, but move to a deeper pot. Fully cover the bare neck in soil up to the lowest section of leaves.
6. Optional Aftercare
Consider placing your African violet in a clear plastic bag for a week after repotting. This boosts humidity, giving your plant a little extra gas in the tank. Just make sure the bag or container doesn’t squish or damage the leaves. We also recommend noting the date on a paper plant tag so you don’t forget when you repotted last.
How do YOU navigate African violet repotting? We want to hear your tricks, tips, and lessons learned. Share them in our Facebook group.
Join the African Violet Club!
Whether you’re just starting out or are a seasoned grower, African Violet Resource Center has everything you need to help your plant grow vibrant and strong. Explore our other articles, visit our online shop, and connect with other houseplant lovers in our Facebook group to learn everything you need to know about this rewarding hobby!
More Great African Violet Resources
African Violet Fertilizer – How to Grow a Healthy Plant
Everything You Need to Know About African Violet Leaves


